はじめに
Tmuxinatorを使って、コマンド1つで定義しておいたTmuxのセッションを起動できるようにしていきます。
Tmuxinatorとは
Tmuxinatorとは、Tmuxのセッションを簡単に作成、管理できるツールです。
コマンド1つであらかじめ決めていた形式で、セッションを作成できるので、わざわざTmuxを起動してからウィンドウ作って、ペインを分割して、、、という作業が必要なくなります。
GitHub - tmuxinator/tmuxinator: Manage complex tmux sessions easily
Manage complex tmux sessions easily. Contribute to tmuxinator/tmuxinator development by creating an account on GitHub.
インストール
Tmuxinatorをインストールする方法はgemを使う方法とbrewを使う方法がありますが、brewでのインストールは現状(2022/9/7)問題があるそうなので、解決されるまではgemでのインストールが推奨されています。
1gem install tmuxinatorエディタの設定
Tmuxinatorをインストールしたら、EDITORの環境変数を設定しておきます。
1export EDITOR='vim'これで、Tmuxinatorがファイルを開くときのエディタが指定できます。
補完
コマンドの補完を有効にするために、それぞれのシェル用のファイルをダウンロードします。
GitHub - tmuxinator/tmuxinator: Manage complex tmux sessions easily
Manage complex tmux sessions easily. Contribute to tmuxinator/tmuxinator development by creating an account on GitHub.
zshの場合はこちらです。
1wget https://raw.githubusercontent.com/tmuxinator/tmuxinator/master/completion/tmuxinator.zsh -O /usr/local/share/zsh/site-functions/_tmuxinatorエイリアス
zsh以外は補完用のファイルにエイリアスが定義されているようですが、将来的に削除する可能性があるそうなので、自分で定義しておきます。
1alias mux=tmuxinator簡単な使い方
最低限必要な、プロジェクト(定義したセッション)の作成と起動の方法を紹介します。
そのほかのコマンドをこちらをご確認ください。
GitHub - tmuxinator/tmuxinator: Manage complex tmux sessions easily
Manage complex tmux sessions easily. Contribute to tmuxinator/tmuxinator development by creating an account on GitHub.
プロジェクト用のファイルの作成
下記のコマンドでプロジェクトの設定ファイル(~/.config/tmuxinator/[project].yml)が作成され、EDITORで指定したエディタで設定ファイルが開かれます。
1mux new [project]現在いるディレクトリに設定ファイルを作成したい場合は、--localオプションをつけます。
1mux new --local [project]プロジェクトの起動
定義したセッション(プロジェクト)を起動する場合は、下記を実行します。
1mux [project]設定方法
プロジェクトの設定ファイルについて紹介します。
GitHub - tmuxinator/tmuxinator: Manage complex tmux sessions easily
Manage complex tmux sessions easily. Contribute to tmuxinator/tmuxinator development by creating an account on GitHub.
下記のような形式でセッションの定義をします。
1name: basic # プロジェクト名
2root: ~/work # デフォルトとなるディレクトリ
3startup_window: main # プロジェクトが作成されたときにどのwindowにいるか
4startup_pane: 0 # プロジェクトが作成されたときにどのパネルにいるか
5windows: # windowの定義
6  - main: # mainという名前のwindow
7      # paneのレイアウト(even-horizontal, even-vertical, main-horizontal, main-vertical, tiled)
8      layout: main-horizontal
9      panes: # paneの定義
10        - work1: # 1つめのpane
11          - cd ~/work/work1 # 起動時に実行するコマンド
12          - clear
13        - work2: # 2つめのpane
14          - cd ~/work/work2
15          - clear
16        - work3: # 3つめのpane
17          - cd ~/work/work3
18          - clear
19  - sub: # subという名前のwinodw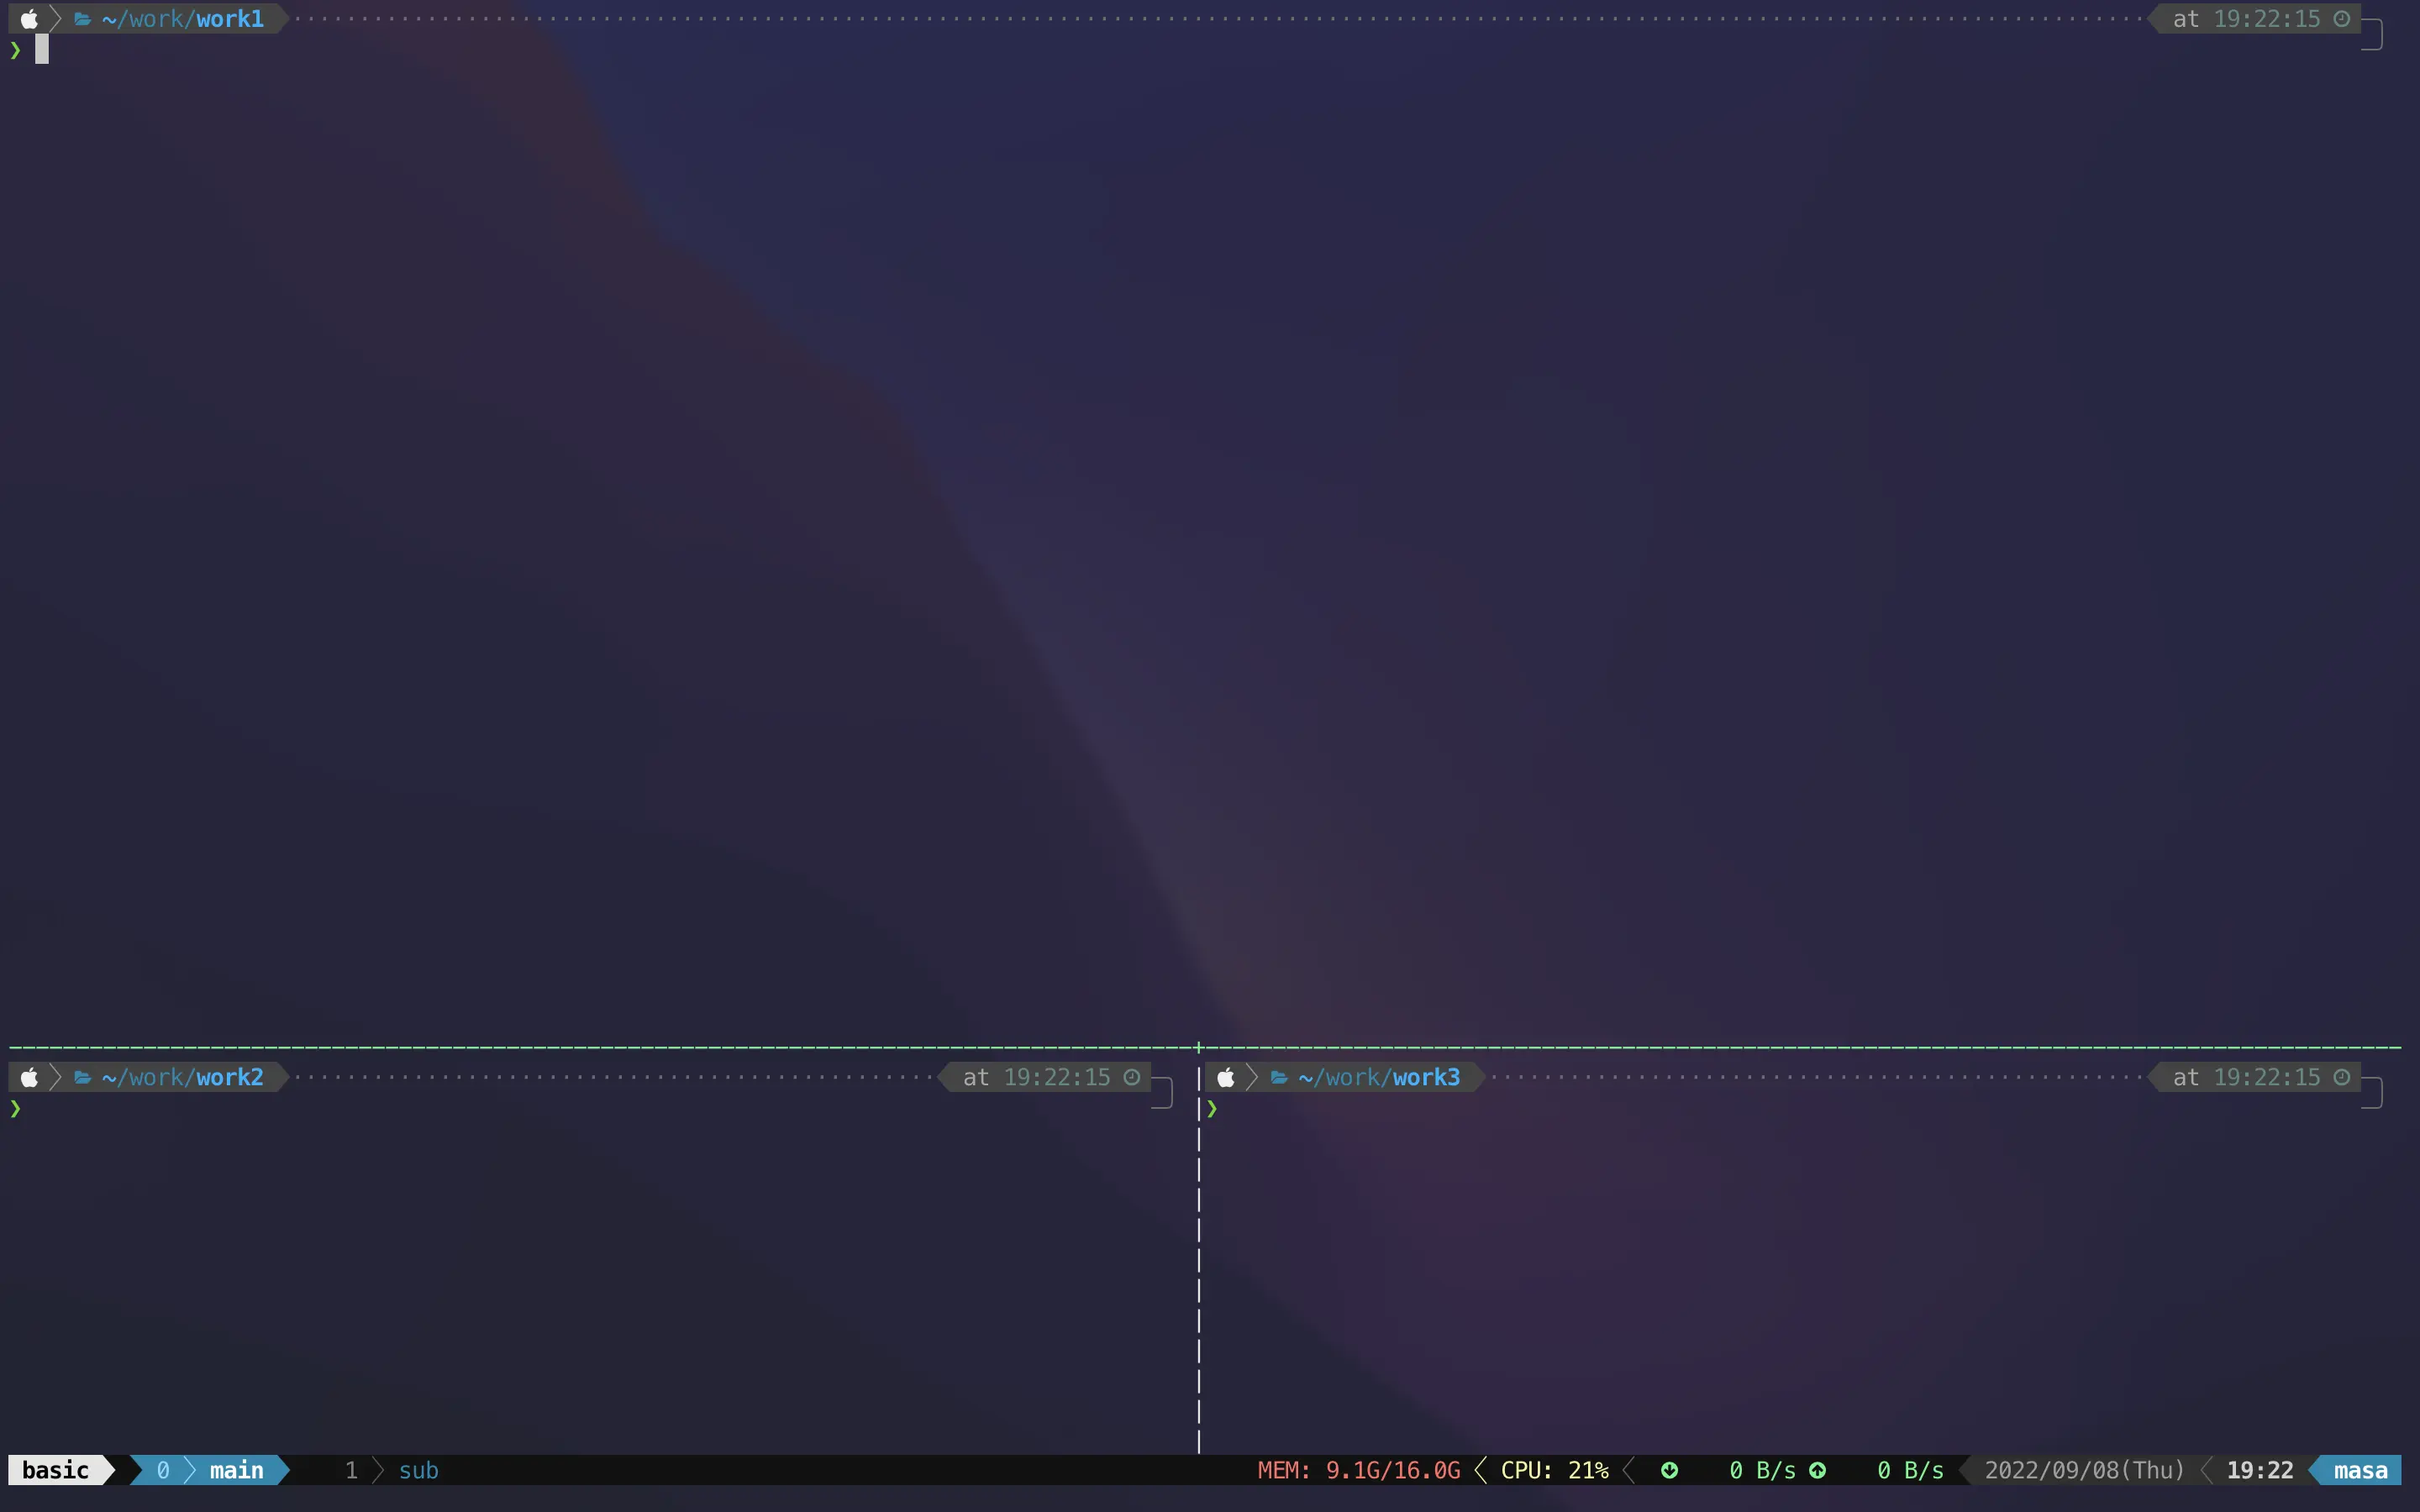
私が今使っている設定の1つは下記のようにしています。(まだ使い始めたばかりなので、これから改善していく予定です)
1name: k8s
2root: ~/work/project1
3startup_window: main
4startup_pane: 1
5windows:
6  - main:
7      layout: main-horizontal
8      panes:
9        - k9s:
10          - k9s -n default
11        - kubectl:
12        - manifest:
13          - cd ~/work/project1/manifest
14          - clear
15  - workspace: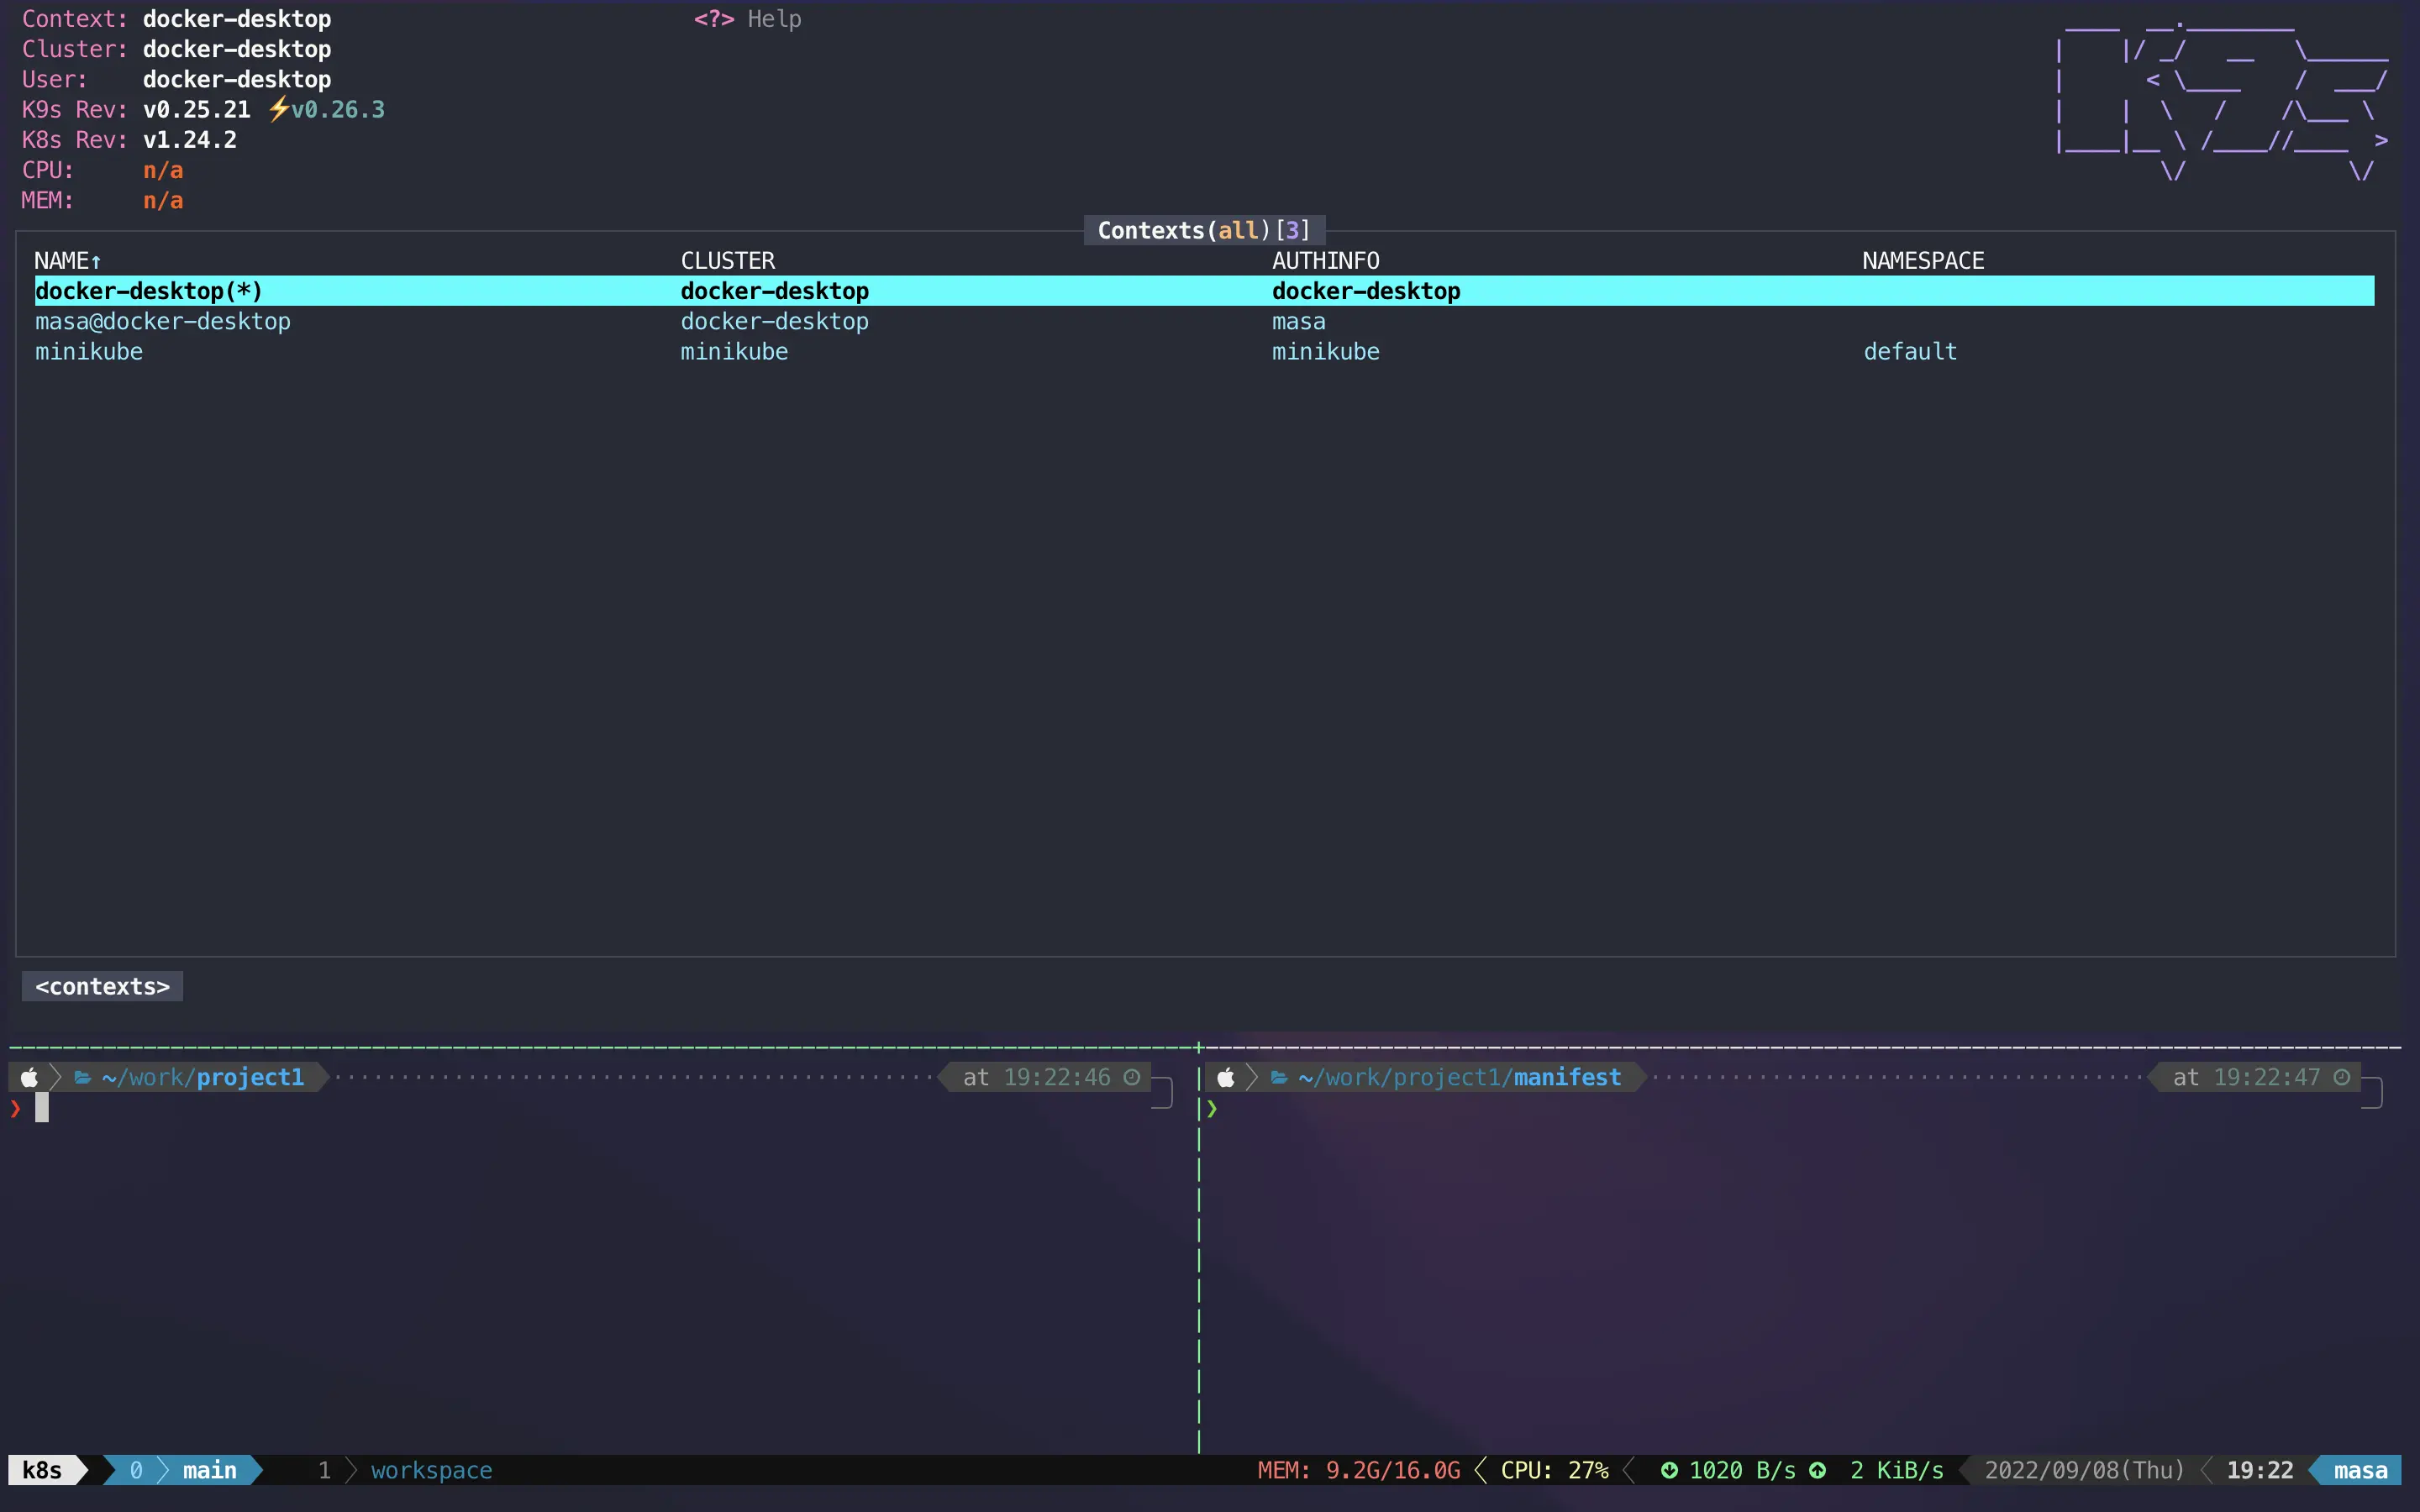
参考
- tmuxinator/tmuxinator: Manage complex tmux sessions easily
- tmux(1) - OpenBSD manual pages
- tmux - Specify pane percentage in tmuxinator project - Stack Overflow
\ この記事が役に立ったと思ったら、サポートお願いします! /

関連記事
Node.jsをアンインストールして再インストール
【Mac】brewでJavaの開発環境構築(複数バージョン対応)

【VSCode】vim拡張が重い場合の対策